Using Microsoft Playwright and NUnit to automate search behaviour
Today I was troubleshooting one of our clients project, where the search function did not return any search results in our local and development environment, but on stage and live everything worked perfectly (so not a super urgent task, but still annoying).
When I was trying out different solutions, I found myself having repeat the same steps over and over again in my browser, such as:
- Starting the website
- Go to the search page
- Fill in a search phrase
- Press submit
- Wait for results..
- ..and then I could finally see that the thing I was trying did not solve it, and then I had to repeat this cycle with another solution.
As it turns out, my Unit Tests did not help me, since this was environment related and the thing that eventually caused the issue had been mocked away. Recently I have been experimenting a lot with different UI testing frameworks such as Selenium, Cypress and Playwright in a public GitHub project and I’ve really come to fancy Microsoft.Playwright for .NET in combination with NUnit.
So I thought maybe I could spend a few minutes automating this boring and repeatable task so that I can spend my time doing better things than repeating a bunch of steps in my browser.
Creating the project
Turns out that getting started with Microsoft.Playwright is really simple. All you need is these 3 steps:
- Create a new NUnit Test Project (.NET 5.0)
- Install the following packages:
- Microsoft.Playwright
- Microsoft.Playwight.NUnit - Create your first test class, any make sure it inherits the base class PageTest.
And that’s it! You dont actually need the Microsoft.Playwight.NUnit package to work with Playwright, but it configures a bunch of stuff for you in the background so that you can jump straight in to writing your tests.
I do recommend however to start at least one project without Microsoft.Playwight.NUnit and configure everything yourself, just so you get a sense of what sort of things that gets automated for you in this package (or you can ju browse around in the source code).
Writing the test
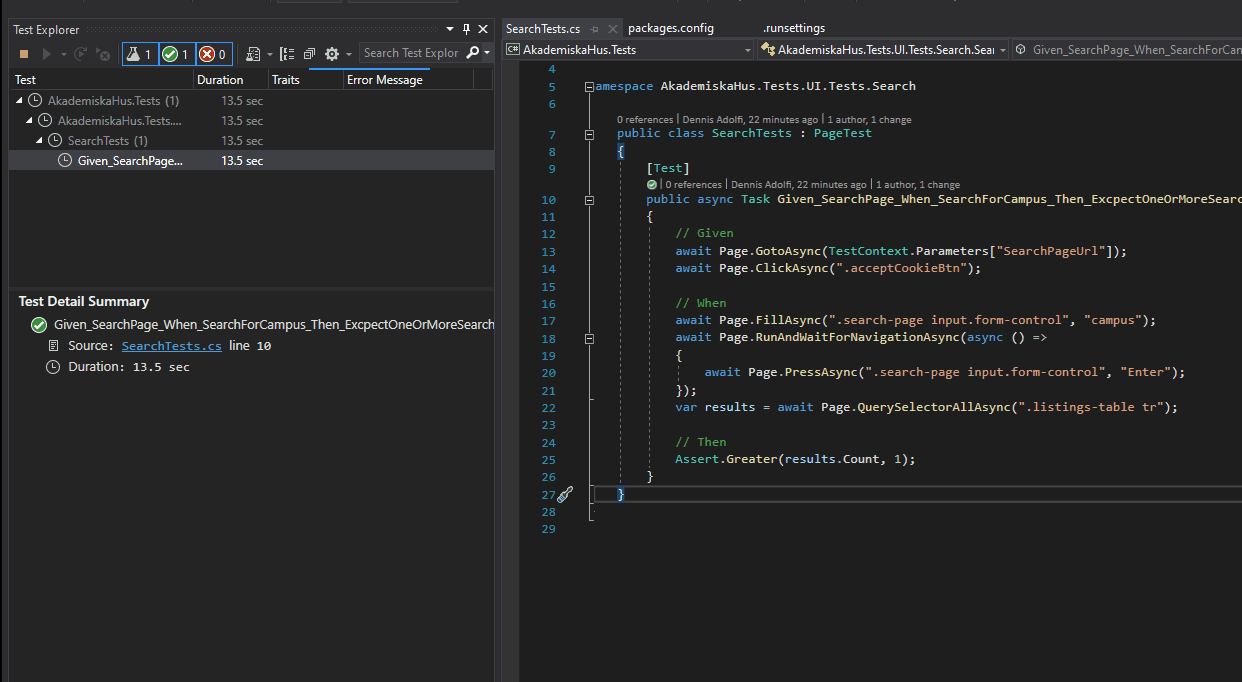
So now when we have our Playwright with NUnit project we can go ahead an create a test that automated the boring task I mentioned earlier. I’m not going to go over every action in this example because the documentation pretty much says it all, but this is what I ended up with:
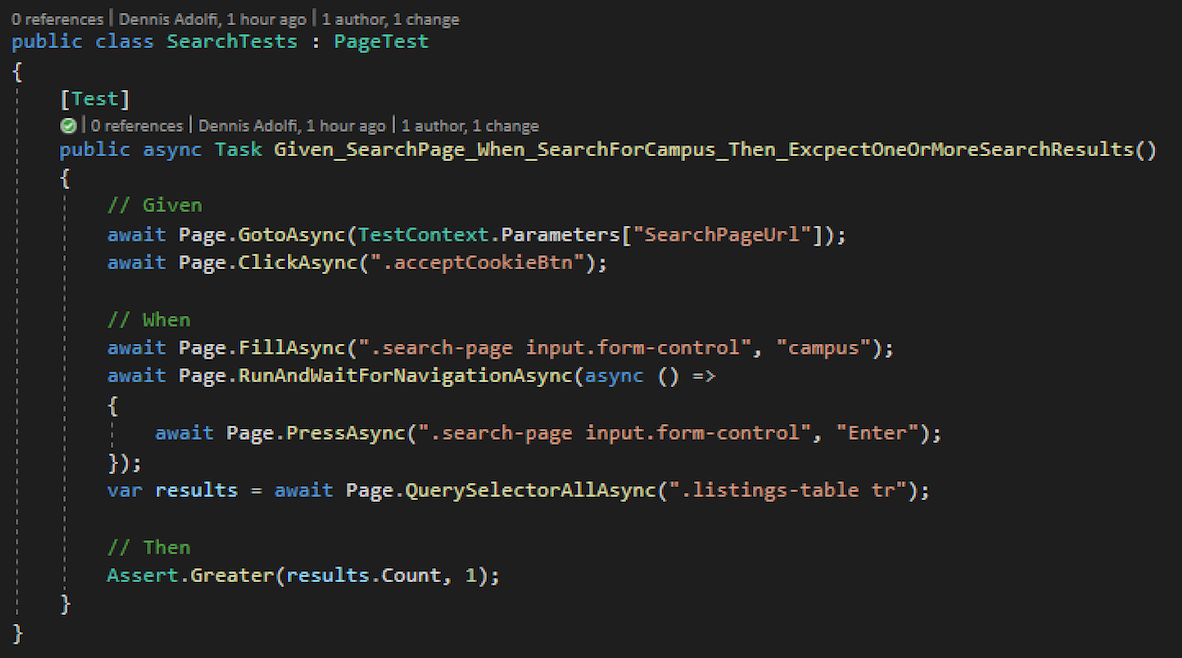
As you can see from this test it goes through these steps:
- Go to my search page (configured in my .runsettings file, more on this later)
- Accept cookies in the cookie banner
- Fill in a search phrase in the input field
- Focus the search input and press Enter
- Wait for the results to render
- Count the number of search results in the table.
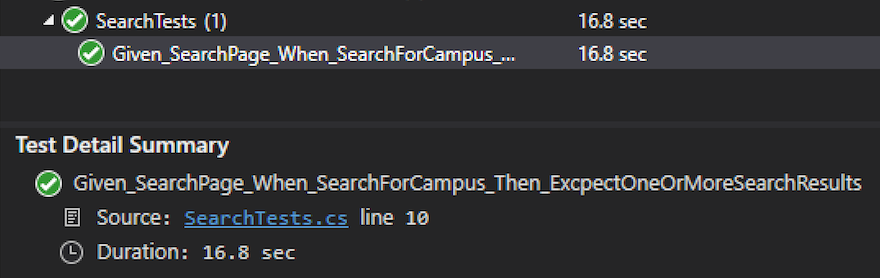
And this is what we end up with:
Headless & .runsettings variables
So by default, Playwright will run my UI tests in a so called headless mode, meaning that we don’t have to watch a bunch of browsers starting up and shutting down over and over, but instead this will happen in the background just as with any regular unit test. I cannot express enough how much I love this feature! ❤️
Usually if something goes wrong, Playwright is really good at telling you what went wrong in the console output, for instance if a selected element does not exist, but if you find yourself wanting to see what actually goes on in the browser you can set the HEADED environment variable in your .runsettings file.
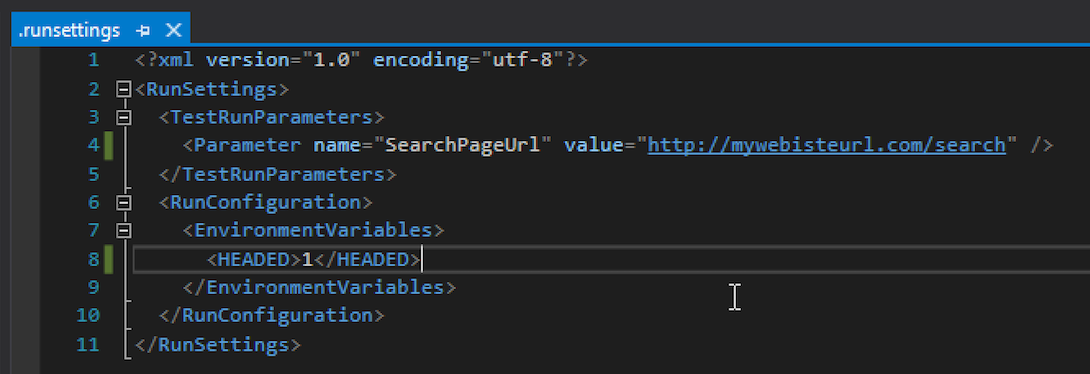
This file is also where I am specifying my SearchPageUrl already mentioned in previous section. If you want to know more about the .runsettings capabilities and setup see this article.
So by setting the HEADED variable to 1 we get this behaviour when we run our tests.
Summary
In the end I found the reason for the different search behaviours, which was related to TLS/SSL, but the solution is not important in this case.
By automating this task I could focus my energy on other things while I tried different solution, such as answering an email/slack or grab a cup of coffee without having to sit and click trough a bunch of stuff in the browser.
Another thing that’s really nice is that now when we have this test I can use it whenever I find myself in a situation where something is not working properly with the search page in the future (or run them as part of our CI/CD process to catch bugs with the search page automatically before any deploy. More on that another time.)
Hope you enjoyed it. Take care of each other!
Cheers friends! ❤️