Tutorial: How to migrate an existing Umbraco website to .NET Aspire

In my previous article I shared a tutorial on how you can get started with .NET Aspire with a brand new Umbraco 13 website running on .NET 8. In this follow-up tutorial I'll cover how you can make the same transition to .NET Aspire but with an existing pre-Umbraco 13 website.
Prerequisite:
Step 1: Upgrading Umbraco
Since .NET Aspire is a new feature in .NET 8 you are required to upgrade your Umbraco site to at least version 13 where .NET 8 final was first introduced. I highly recommend you use the official Umbraco Upgrade documentation and use the Version specific upgrades section to target your current Umbraco version so you don’t miss any version specific tweaks. Once you have successfully upgraded your site to Umbraco 13 (or higher) you may proceed with the next step in this tutorial.
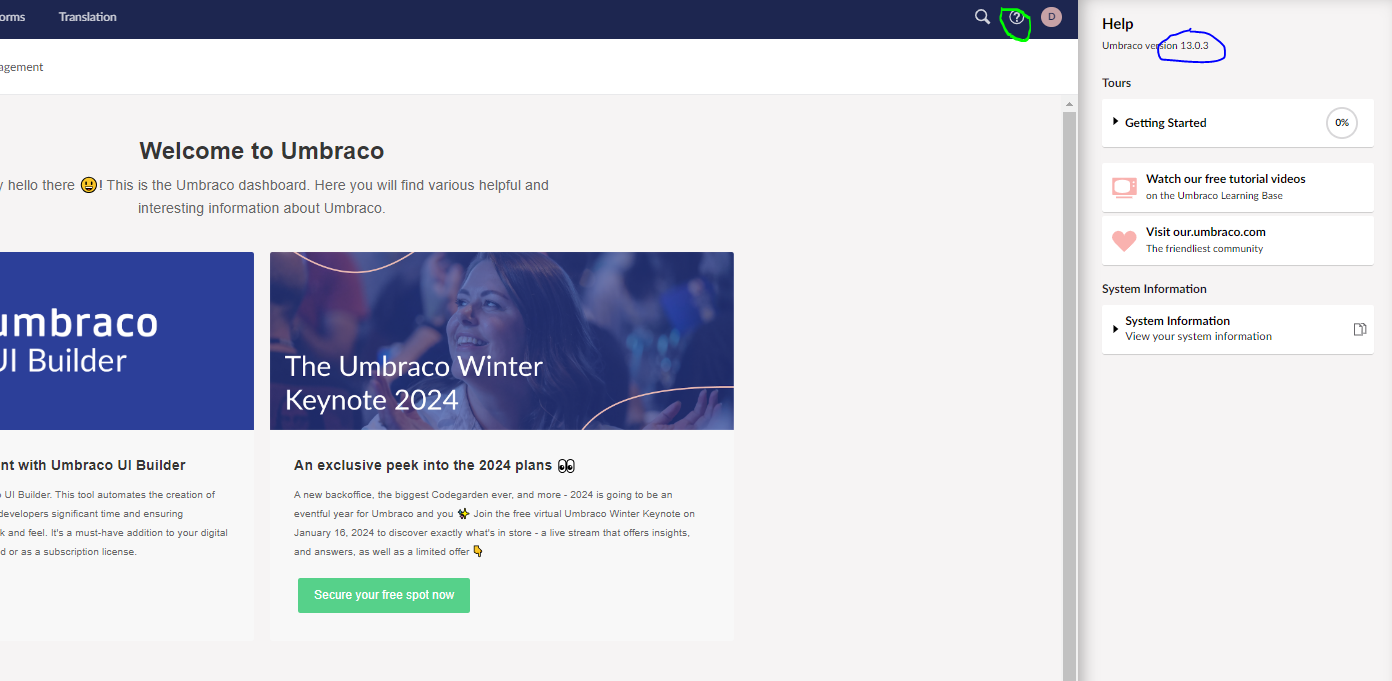
You can confirm the Umbraco version installed by logging into Umbraco back-office and clicking the question mark icon in the top right corner.
Step 2: Migrate your Program.cs and Startup.cs
Before Umbraco 13 and .NET 8, your application startup model was split into two files: Program.cs and Startup.cs. In Umbraco 13 these files has been merged into one single Program.cs file, Startup.cs is no longer a thing and there has been a few changed to how this file is structured as well as some dependency updates.
Before proceeding to the next step in this tutorial make sure you migrate your Umbraco project to use the single Program.cs model, since the structure and dependencies in this new model is a requirement for some of the .NET Aspire extensions to work. Have a look at the vanilla Umbraco 13 Program.cs file and update yours accordingly.
Step 3: Migrate to .NET Aspire
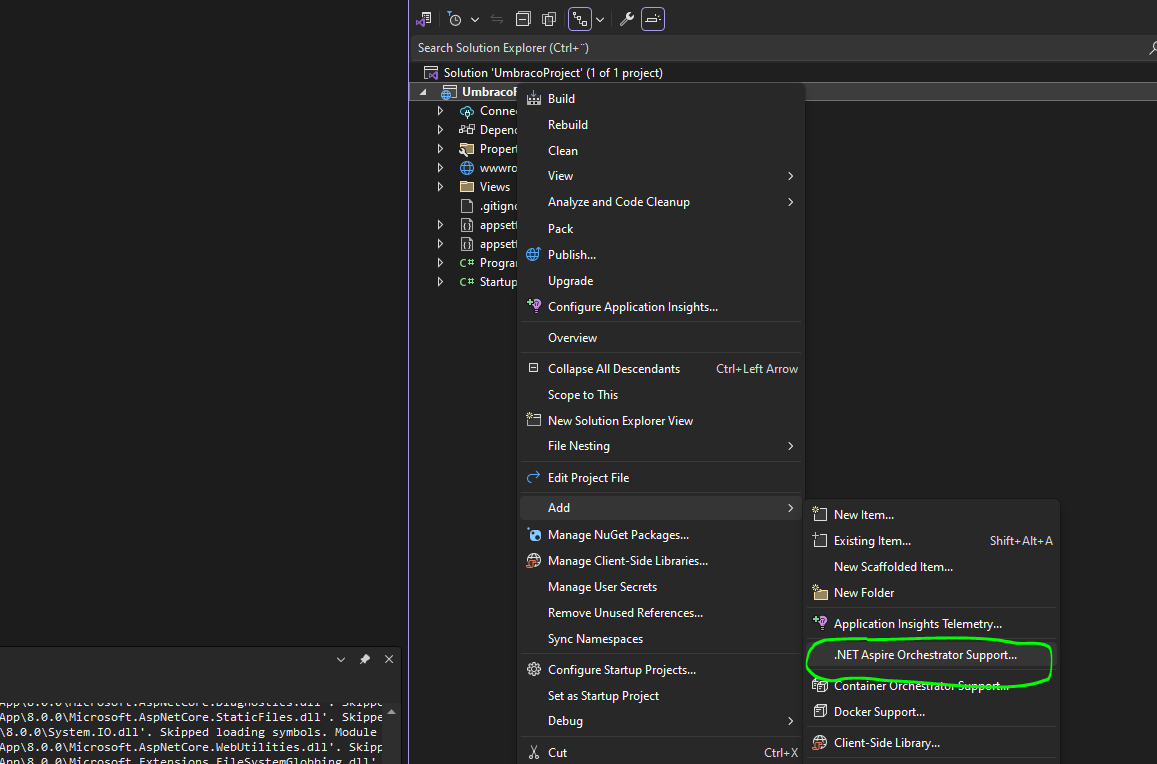
Finally, you've done all the necassary preparations and your're now ready for the migration part. Next you need to migrate your upgraded Umbraco 13 website to a .NET Aspire solution by Right-clicking on your solution > Add > .NET Aspire Orchestrator Support.
Visual Studio will then ask you for a Project name which most likely will be pre-filled with the current solution name, a Framework version (which at the moment only supports .NET 8) and a location for these new projects.
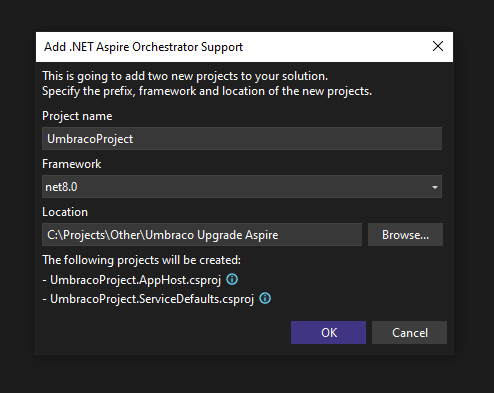
Important: Make sure the specified location of these two projects are outside of your Umbraco directory or you will get yourself in a whole lot of trouble.
What will happen is that Visual Studio will add two new projects to your Solution: AppHost and ServiceDefaults. Make sure that the AppHost project is set as your Startup project.

If you want to know more about these two new solution projects make sure to read my previous tutorial.
In your AppHost Program.cs file Visual Studio will (hopefully) have added a reference to your Umbraco website with the DistributedApplicationBuilder.
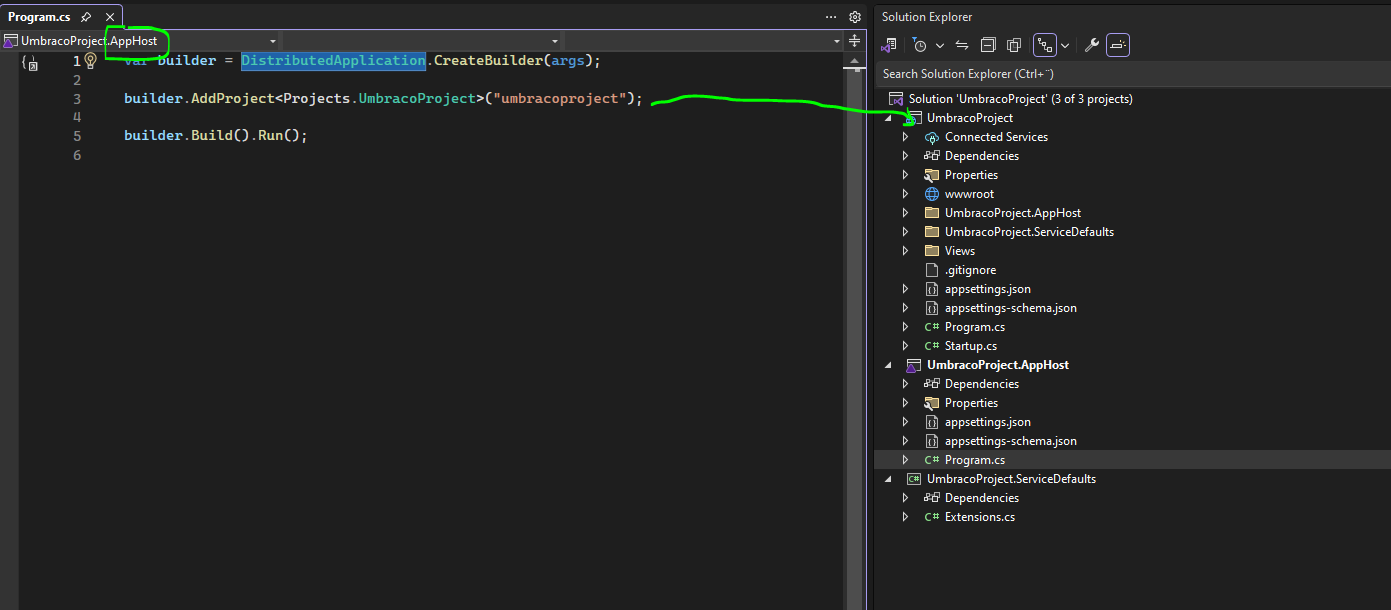
If this has not been done automatically by Visual Studio, make sure you add this reference manually (this is covered in my previous tutorial).
Step 4: Add ServiceDefaults to Umbraco
To connect everything together, next you need to add a reference from your Umbraco project to the newly created ServiceDefaults project go gain access to the extensions builder.AddServiceDefaults() and app.MapDefaultEndpoints(). This is also covered in step 4 of my previous tutorial.
If you're lucky, this step might already have been covered for you automatically during Visual Studios .NET Aspire migration. In my experience I’ve found that this is a bit random depending on the nature of my Program.cs file structure if Visual Studio manages to figure out where to add these extensions or not.
Step 4: Build, Run & Amaze! 🤩
Congratulations, you have now successfully migrated your Umbraco website to .NET Aspire. 🎉
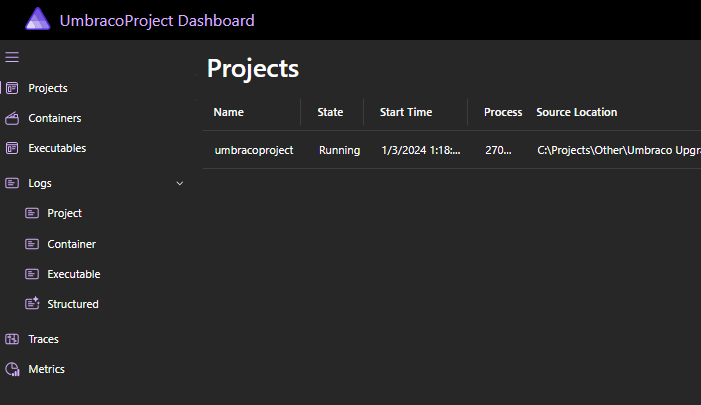
When running your AppHost project you will get the new .NET Aspire Dashboard in your browser and you should see your Umbraco project listed in the Projects section. Now you can start exploring all the benefits of .NET Aspire and view things like Traces, Metrics, Logs, Environment variables etc.
Important: You might get an issue related to applicationUrl port conflicts when first running your Umbraco project as part of .NET Aspire. This is a known issue and I’ve covered how you can get around it in my previous tutorial.
Summary
In this tutorial we’ve covered how you can take a old Umbraco (pre version 13) website and migrate it to .NET Aspire by upgrading to Umbraco 13, .NET 8 and use the .NET Aspire Orchestrator Support feature in Visual Studio.
Hope you enjoyed it.
Cheers friends! 💜