Custom Umbraco NotificationHandlers

The other day I stumbled across a question on Our, Umbraco’s friendly support forum, that I knew I'd been working on something similar not too long ago and I was able to help the original author find the answer to their question.
In this blogpost I’ll share an updated version of this answer but for the latest version of Umbraco (12.1.2).
Custom Notification Handlers
Whenever a content item is published in Umbraco a ContentPublishingNotification event will be triggered. By creating our own NotificationHandler we can hijack this event and cancel or extend the default notification when a user is publishing a content node in Umbraco.
In this example we will check if the publishing content item has a property called “Meta Description” and if this property is null we want to show a warning. We do not want to cancel the publishing event since this is not of such importance that it should be cancelled, but we want to give a little friendly heads up in the back-office.
- Create a MetaNotificationHandler.cs. Make sure this new class inherits INotificationHandler<ContentPublishingNotification> and implements the Handle method.
public class MetaNotificationHandler : INotificationHandler<ContentPublishingNotification>
- Validate the content items. Since Umbraco can publish multiple content items at the same time (list views, publishing multiple children etc.) the Handle notification contains a list of PublishedEntities. These are the entities we want to iterate and perform some sort of validation on.
public void Handle(ContentPublishingNotification notification) { foreach (var entity in notification.PublishedEntities) { foreach (var property in entity.GetDirtyProperties()) { string propertyName = property.ToString().ToLower(); if (propertyName == "metadescription") { var value = entity.GetValue(property); if (value == null) { // Next step.. } } } } } - Add your custom EventMessage. If the validation is not passed, we add our own custom EventMessage along with an EventMessageType (Info, Warning, Error, Success) which will determine the coloring of our new notification (more on this in the results view).
notification.Messages.Add(new EventMessage("MetaValidation", "Oops! You are missing a Meta Description for this page.", EventMessageType.Warning)); - Register your NotificationHandler. The last thing we need to do is register our new NotificationHandler using the .AddNotificationHandler<ContentPublishingNotification, MetaNotificationHandler>() in our Startup.cs under ConfigureServices.
services.AddUmbraco(_env, _config)
.AddBackOffice()
.AddWebsite()
.AddDeliveryApi()
.AddComposers()
.AddNotificationHandler<ContentPublishingNotification, MetaNotificationHandler>().Build(); - Trigger a Publish event and see the result. Now we can login to Umbraco, navigate to a content item and and select “Save and Publish” and see our new notification in the back-office (make sure you have added the meta description property otherwise the validation won’t be applied.)
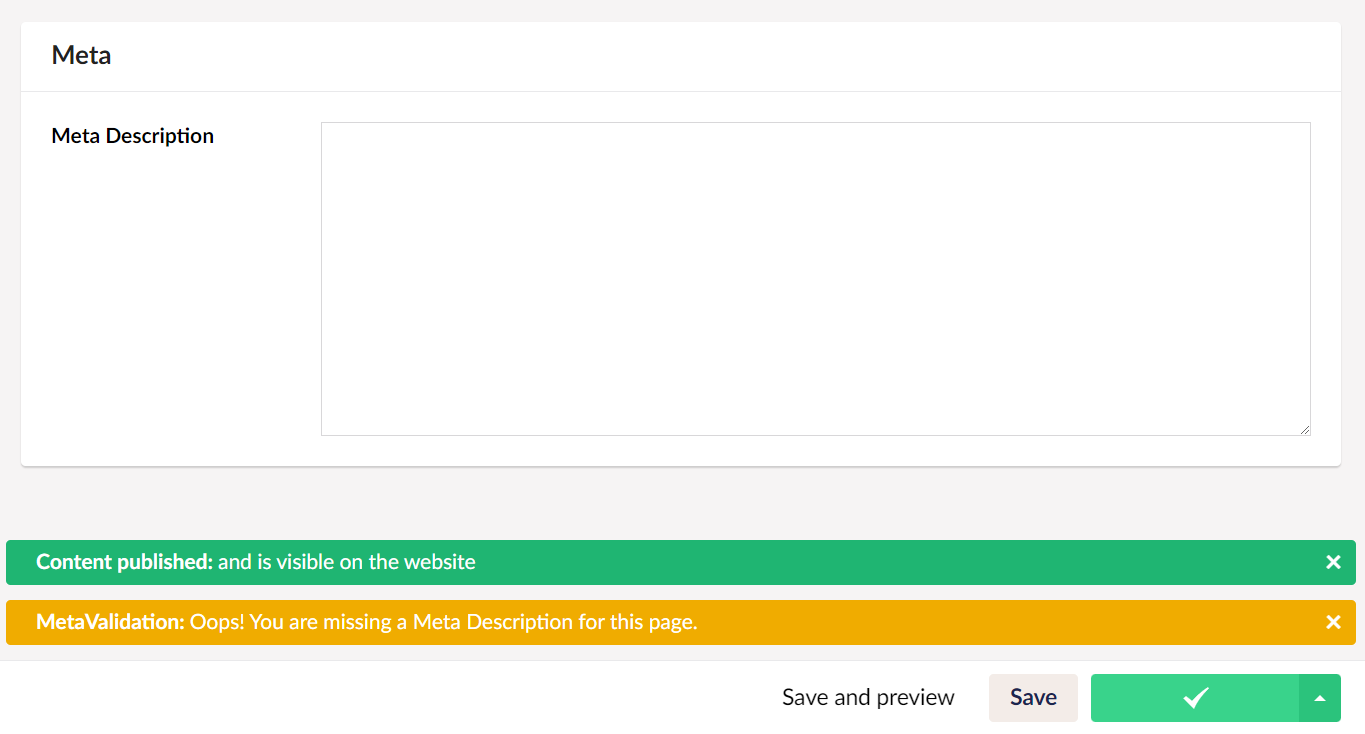
Note that if you really do want to cancel the publishing event if the validation is not valid, you only need to change this so that you add your custom EventMessage to the notification.CancelOperation instead of notification.Messages. In that case the user will not be able to publish the content item until they add a meta description first.
Summary
In this blogpost we have extended the ContentPublishingNotification event in Umbraco 12 with our own custom NotificationHandler, applied some validation and added our own custom EventMessage to give our back-office user a friendly reminder about the state of the published content item. Hope you enjoyed it.
Cheers friends! ❤️